3 Tips to Improve your Night Snorkeling Photos

I recently snorkeled for the first time at night, and it was like I had struck photographic gold. Typically shy sea creatures hunted in the open everywhere I looked. Lobsters, squid, eels, lion fish—I filmed them all by the light of an inexpensive underwater flashlight and then hurried back to my vacation rental to view the footage.
To my disappointment most of the footage was ruined, my perfectly accommodating subjects blown out by beams of intense light. What had looked normal to my eyes underwater was too bright for the camera, and I learned a valuable lesson about taking night photos with a flashlight—don’t shine your light directly on the subject!

Based on the mistakes I made that night, I’m offering you these three pieces of advice to improve your chances of getting good underwater photos at night and on a budget:
1. Scout Your Location
It’s important to choose a snorkeling spot with lights on the shore so that you can find the way back to your entry point. Snorkel the location first during the day to make sure that there are plenty of fish and hiding places for eels, lobsters, and other nocturnal hunters. A shallow reef or rocky area close to shore and near a hotel or restaurant is ideal for your first experience.

2. Prepare Your Equipment
Beside your mask, snorkel, and fins, you will need an underwater flashlight, your camera, and some water clothes or a wet suit.

Clothing: Remember that your body temperature is 98.6, so even with water temperature in the warm 80-degree range, you’ll feel cold quickly without the heat of the sun shining down on you. I didn’t bring a wet suit on my trip, so I wore two layers of long-sleeved, full-length swim tops and bottoms over my bathing suit, and I was still chilled after about 15–20 minutes in the water.

Flashlights: An underwater flashlight costs about $70 in a dive shop, but my husband found many inexpensive models online. We opted for small $15 lights that strapped to our wrists and had high, low, and flashing settings. Practice changing the settings before you swim with them so you can easily turn the lowest or widest setting toward your subject without fumbling. Keeping your subject in the edge of the light where the beam is less intense will provide better results, and don’t forget to tell your dive buddy that only one light should shine on a subject at a time.

Cameras: I recommend any GoPro-style action camera. A GoPro works well, but there are also many other options to fit your price range. I use a Garmin Virb in an underwater housing because it is easy to operate with one hand, and it is water resistant in case the housing leaks. Set your camera to the video mode before entering the water, and don’t try to change modes while you’re snorkeling or you may accidentally end up on the wrong setting.
3. Create Photos from Videos
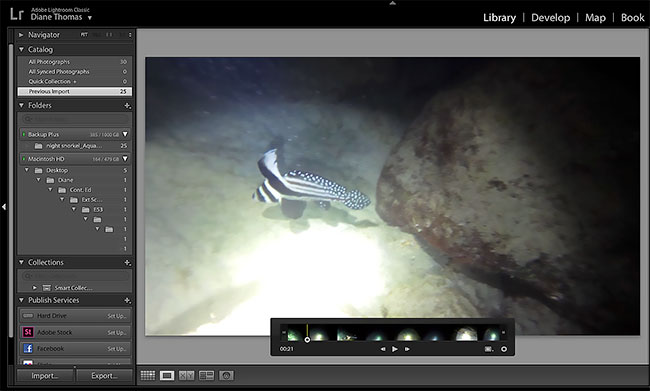
I choose to take videos because I’ve found that extracting photos from my video footage gives me more options for great shots. By keeping the camera running a few minutes at a time, I can capture more of my subjects’ fascinating and even unexpected behaviors. And by not changing back and forth between video and photo modes underwater, I don’t make mistakes that keep me from getting the shots I think I am getting.
While watching the footage on my computer, I pause the video and take screen shots of my best frames. Then I import those screenshots into a photo editing program to adjust the lighting, color, and sharpness. While the resulting images won’t win any National Geographic photo contests, they are perfect for sharing with my friends and family online, and for making 4×6 or 5×7 prints for my home.

Make a Decision
Depending on your budget, there are many screen capture and photo editing programs available. You can find free versions or you can also purchase a subscription to higher-end programs like Adobe’s Photoshop and Lightroom applications, which can be worth the investment if you plan to do this type of editing often. If you’re interested, consider starting a free-trial after your next snorkeling photo session.
The trade-off to consider is between investing in a higher-end underwater camera or investing in post-production tools to adjust for less expensive camera equipment. Think about where you want to put your money, whether it’s better for you to master underwater photography or photo editing, and how easy or difficult it is to travel with the equipment you choose.
All photographs are the property of Diane Thomas unless otherwise noted. They are protected by U.S. Copyright Laws, and are not to be downloaded or reproduced in any way without the written permission. Copyright 2019. Diane Thomas All Rights Reserved.